I've been doing some selfish sewing for Selfish Sewing Week! I'm delighted to be a featured stitcher this time around and it has been great to have an excuse to make something for me despite being inundated with work at the minute and there being a half finished top for my Mum and shirt for my Stepdad looking at me from a pile in the corner! Rachael from Imagine Gnats runs this event bi-annually and it is all about taking some time to sew something you really want to sew just for you. All week a wide selection of sewing bloggers are going to be sharing their finished projects on their blogs, using patterns from a huge range of indie designers.

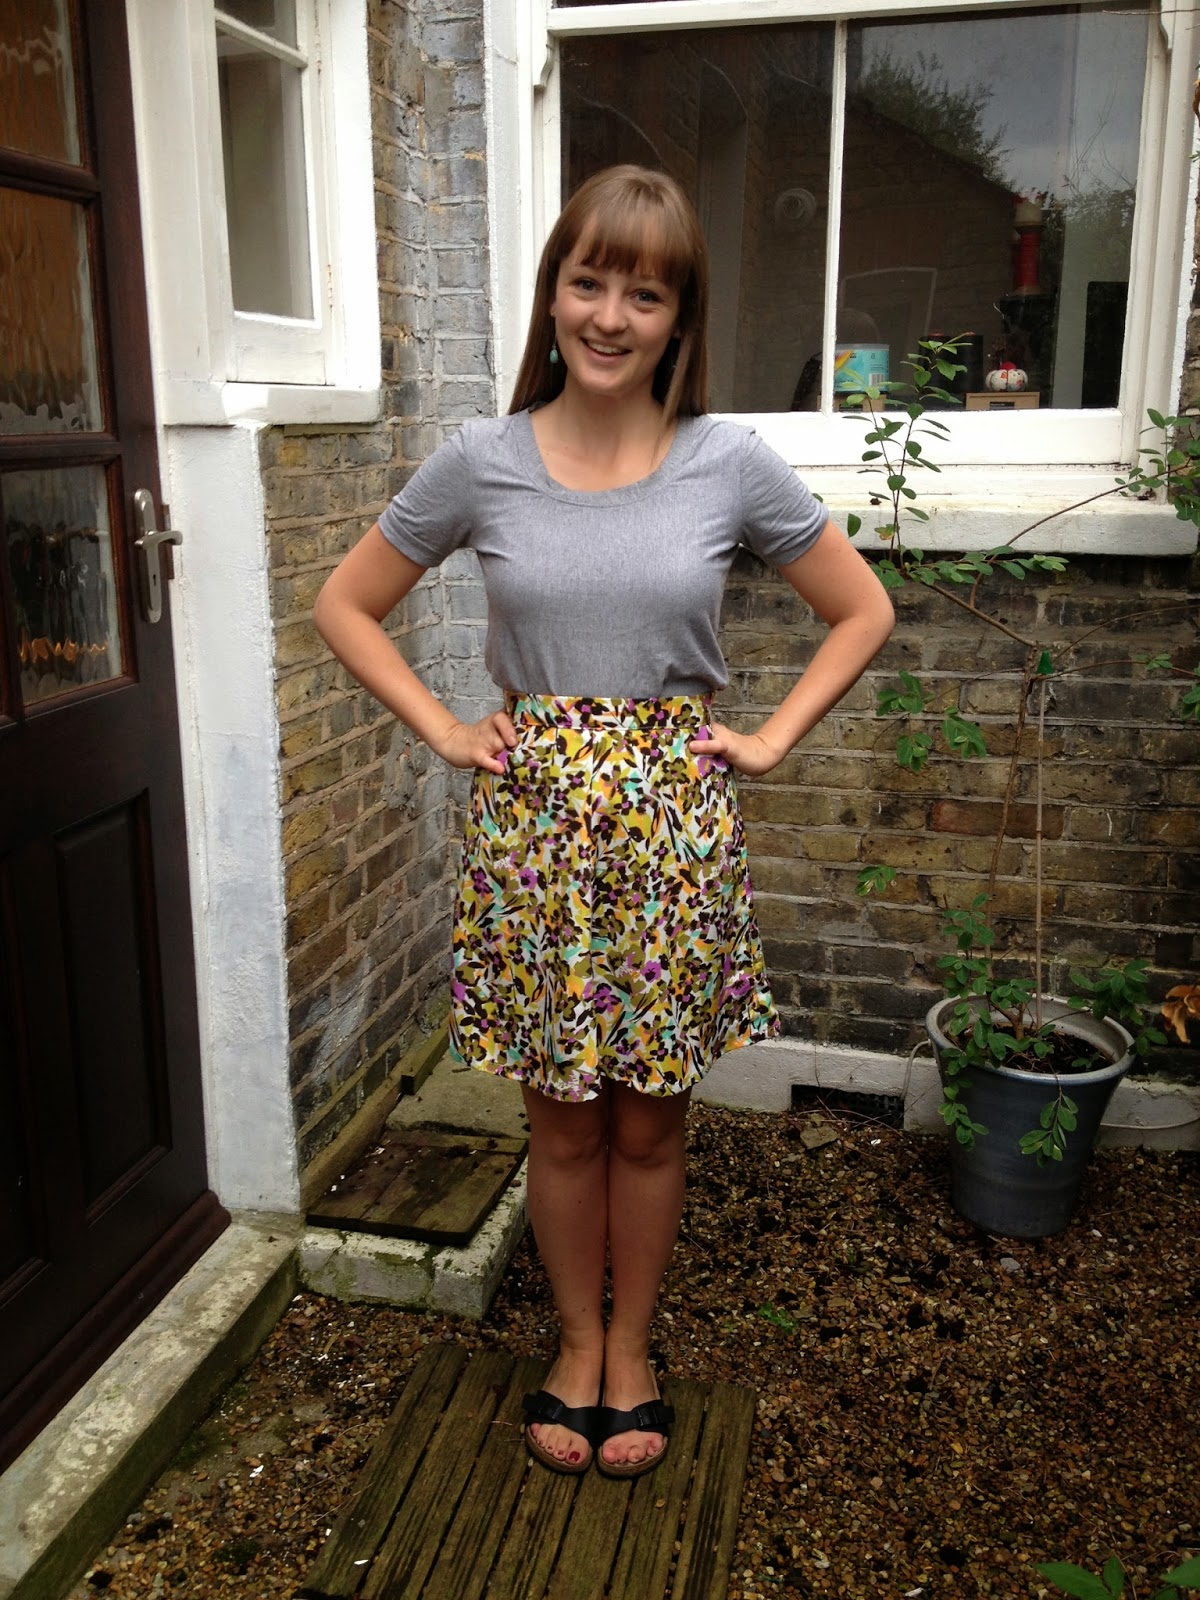
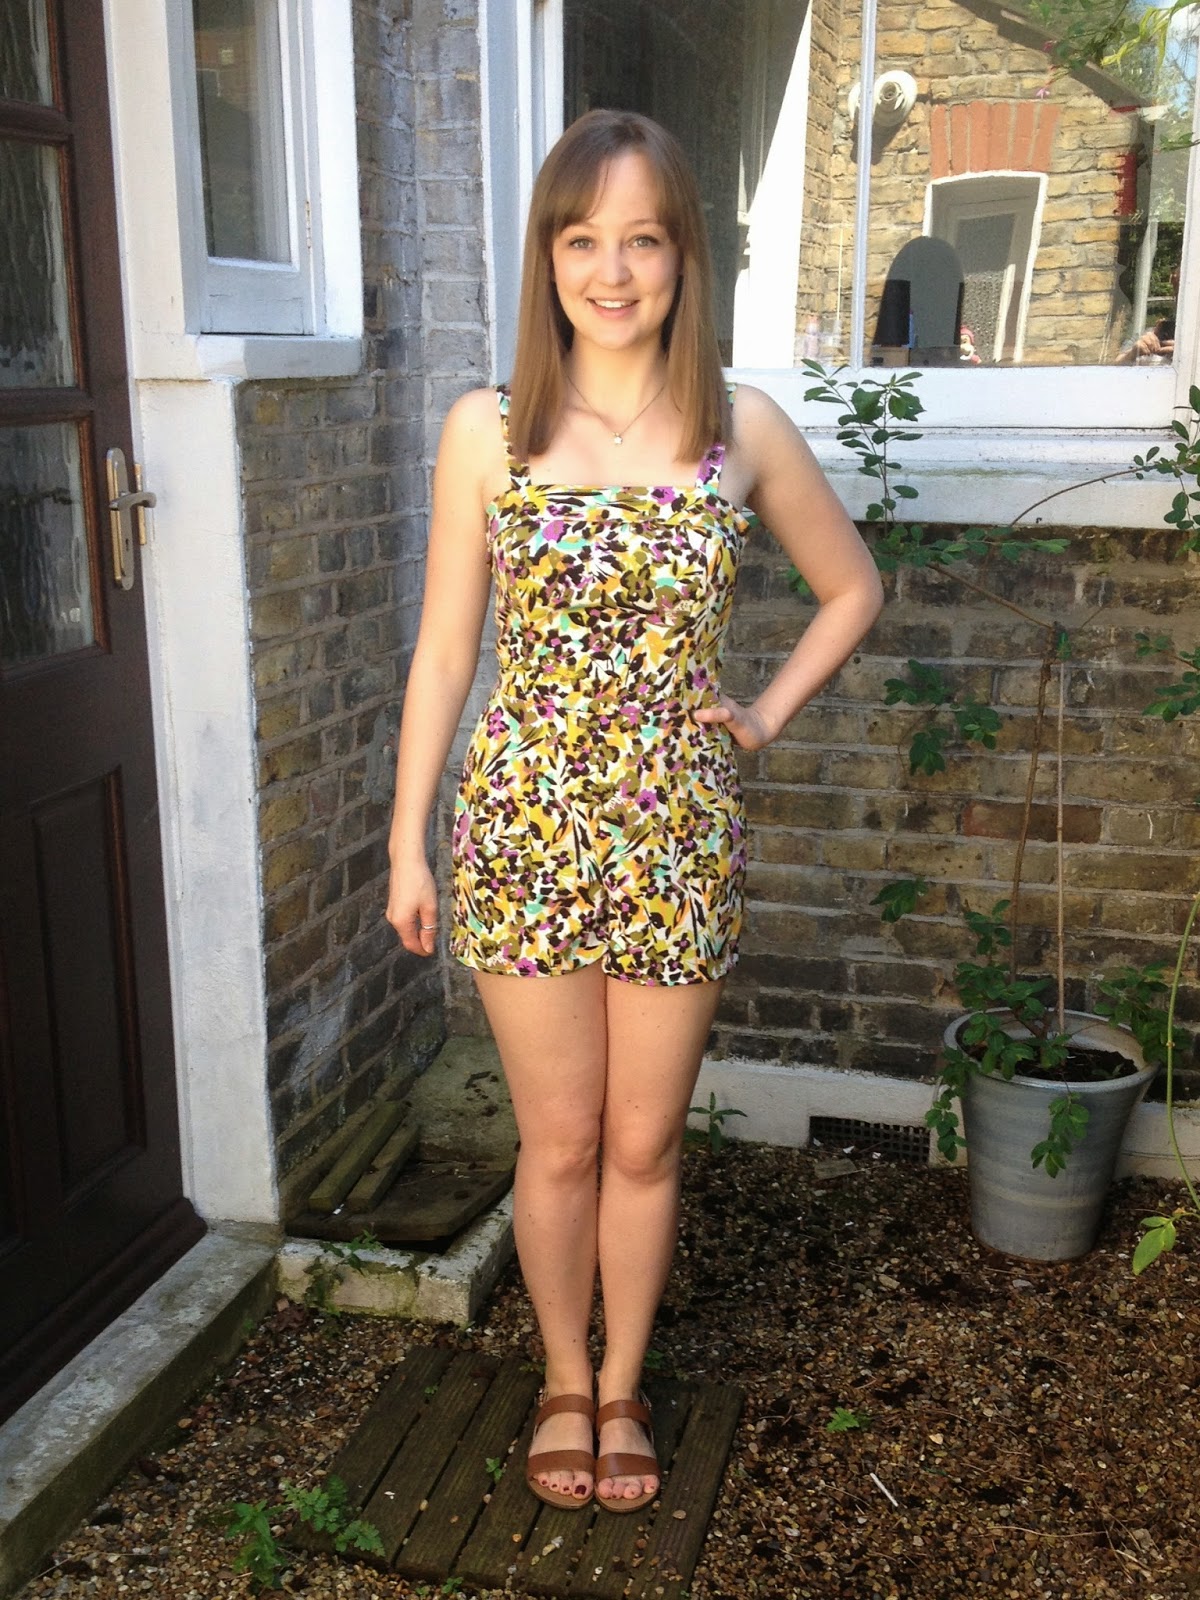
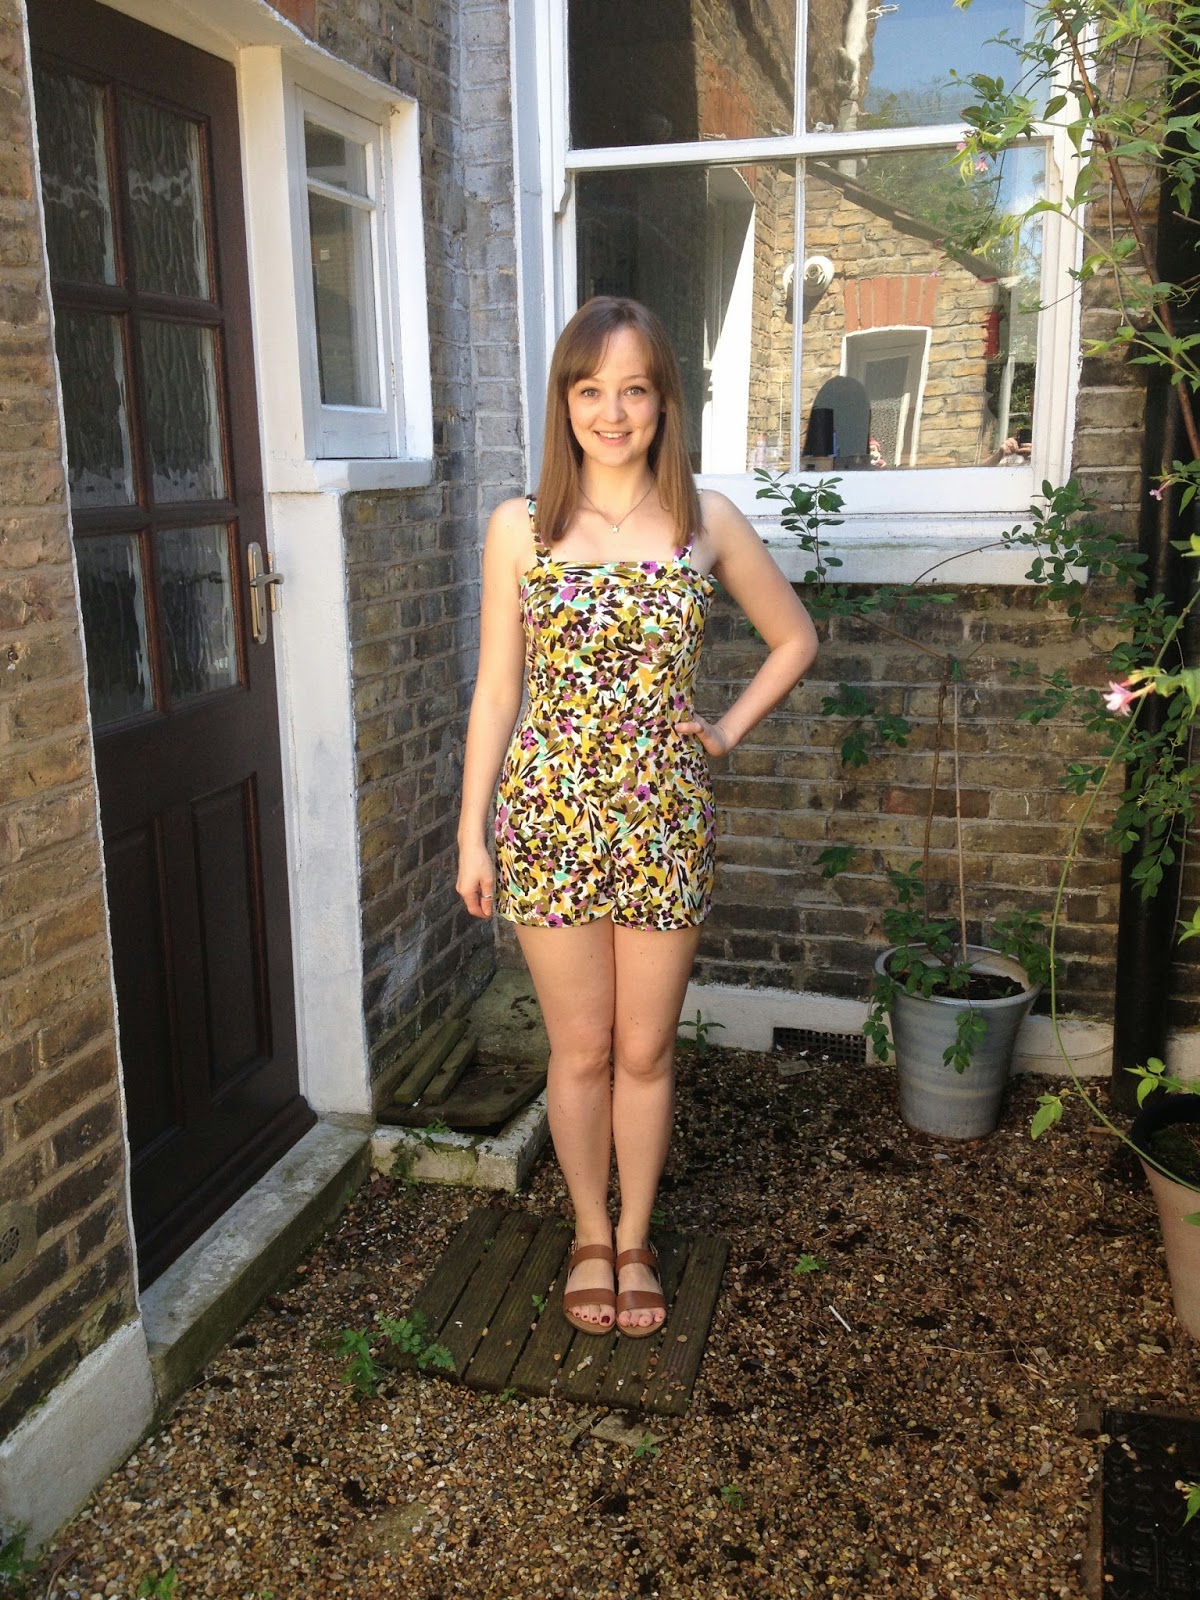
I was lucky enough to receive a copy of the new Clover Dress from Papercut Patterns to treat myself with. I did actually have my eye on the Midsummer Night's Dream wrap dress (and actually have had my eye on that since it's first release which must be nearly two years ago! Ha!) but after requesting that Katie offered up the yet to be released at that point Clover and I could not resist! It's a design from local Kiwi fashion designer Brooke Tyson's collection, who has collaborated with Papercut to make her design available to us in pattern form. The pattern even includes instructions for making your own tasselled belt from embroidery floss, I haven't got round to that part yet but can't wait! To be clear from the outset I'm not just saying that I like it because I received it for free; I genuinely love the relaxed style and fit of this dress, it really fits with what I like to wear and I've received a fair few compliments on it at work which I'm really chuffed about!

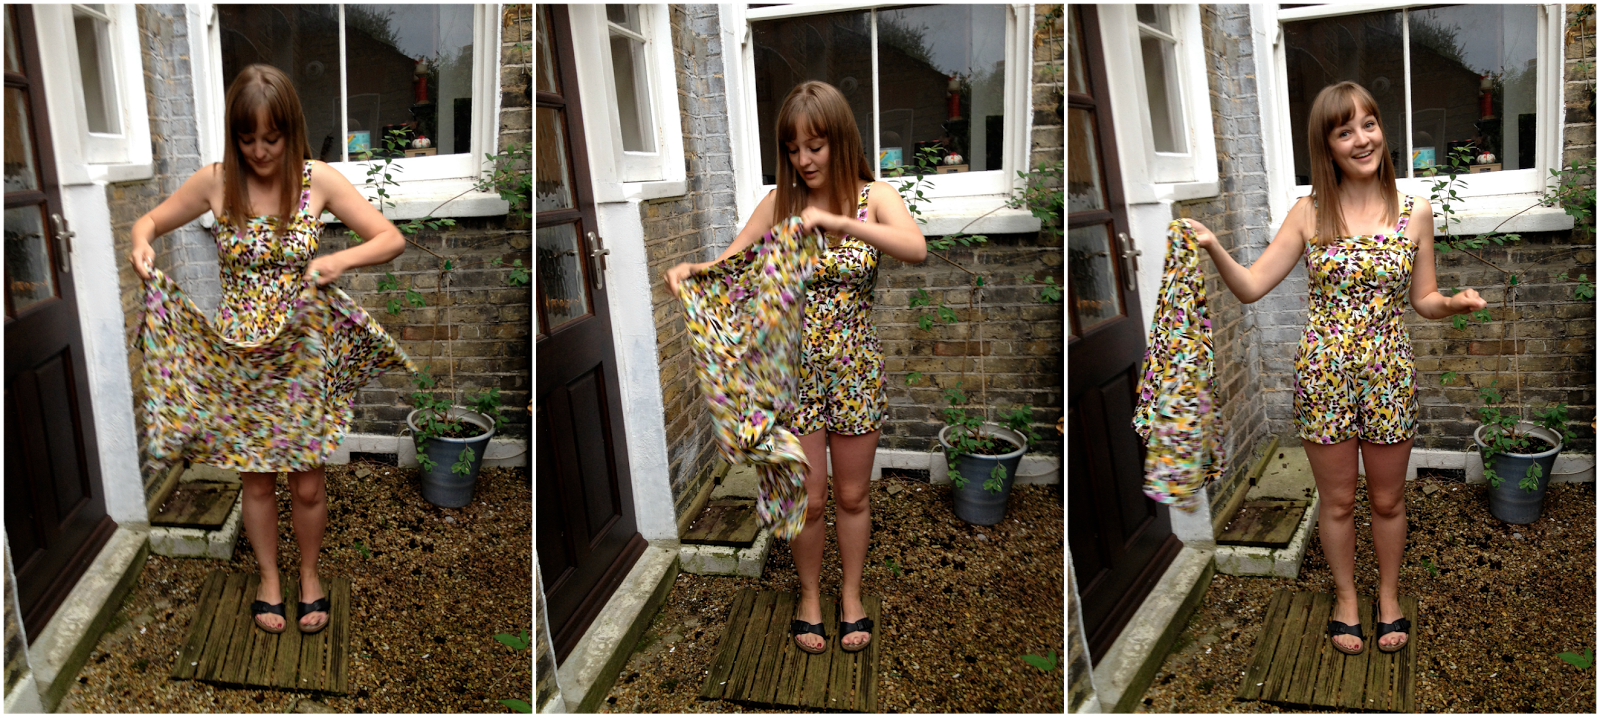
I sewed it up with a beautiful viscose print which I picked up in Fabric Land on Goldhawk Road a few weeks ago (when I was shopping for work...oops!). I'd intended it for an Alder Shirtdress but something about the lovely drape and silky lightweight nature of it said it would be better suited to this project. I know a few other bloggers have bought some of this before, Kathyrn in particular made some great trousers out of it! The print is really interesting and kind of reminds me of those crackle effect nail polishes or rag rolled walls! I think it was only about £3/m and I got this out of exactly the recommended 1.8m.

Viscose is the perfect fabric for this dress. I'm a huge fan of both working with and wearing viscose in general because it has such a gorgeous drape and is so easy to wear. I've got a bit of a rule that if I ever spot a beautiful viscose print at a bargain price I absolutely must buy it as too many times before I've passed it by thinking 'I'll be able to find something like that in future' and when the time comes to make a floaty dress or top I never can!

I was slightly concerned about how much ease there was involved in this pattern as it's kind of hard to tell how much fabric is being pulled in by the belt in the promo pictures. I like to avoid having too much going on around the waist and didn't want it to be too much of a sack worn without a belt. I was between sizes on the Papercut guide so because of my ease concerns decided to cut the smaller which was the XS. I'm really pleased with how the fit turned out; it's nice and comfortable around the shoulders and bust and I actually like the shaping at the waist, I don't feel swamped in fabric at all. I kept the length as it is in the pattern, although I did trim a fair bit off while trying to level it up as it dropped all kinds of wonky when I left it to hang overnight. In the promotional pictures it looks as it it has a slight dipped hem on the model but I just levelled mine straight off. I really like this length for wearing day to day as it's not so short that I need to worry about flashing people as I get on and off the tube but is short enough to be fun and youthful.

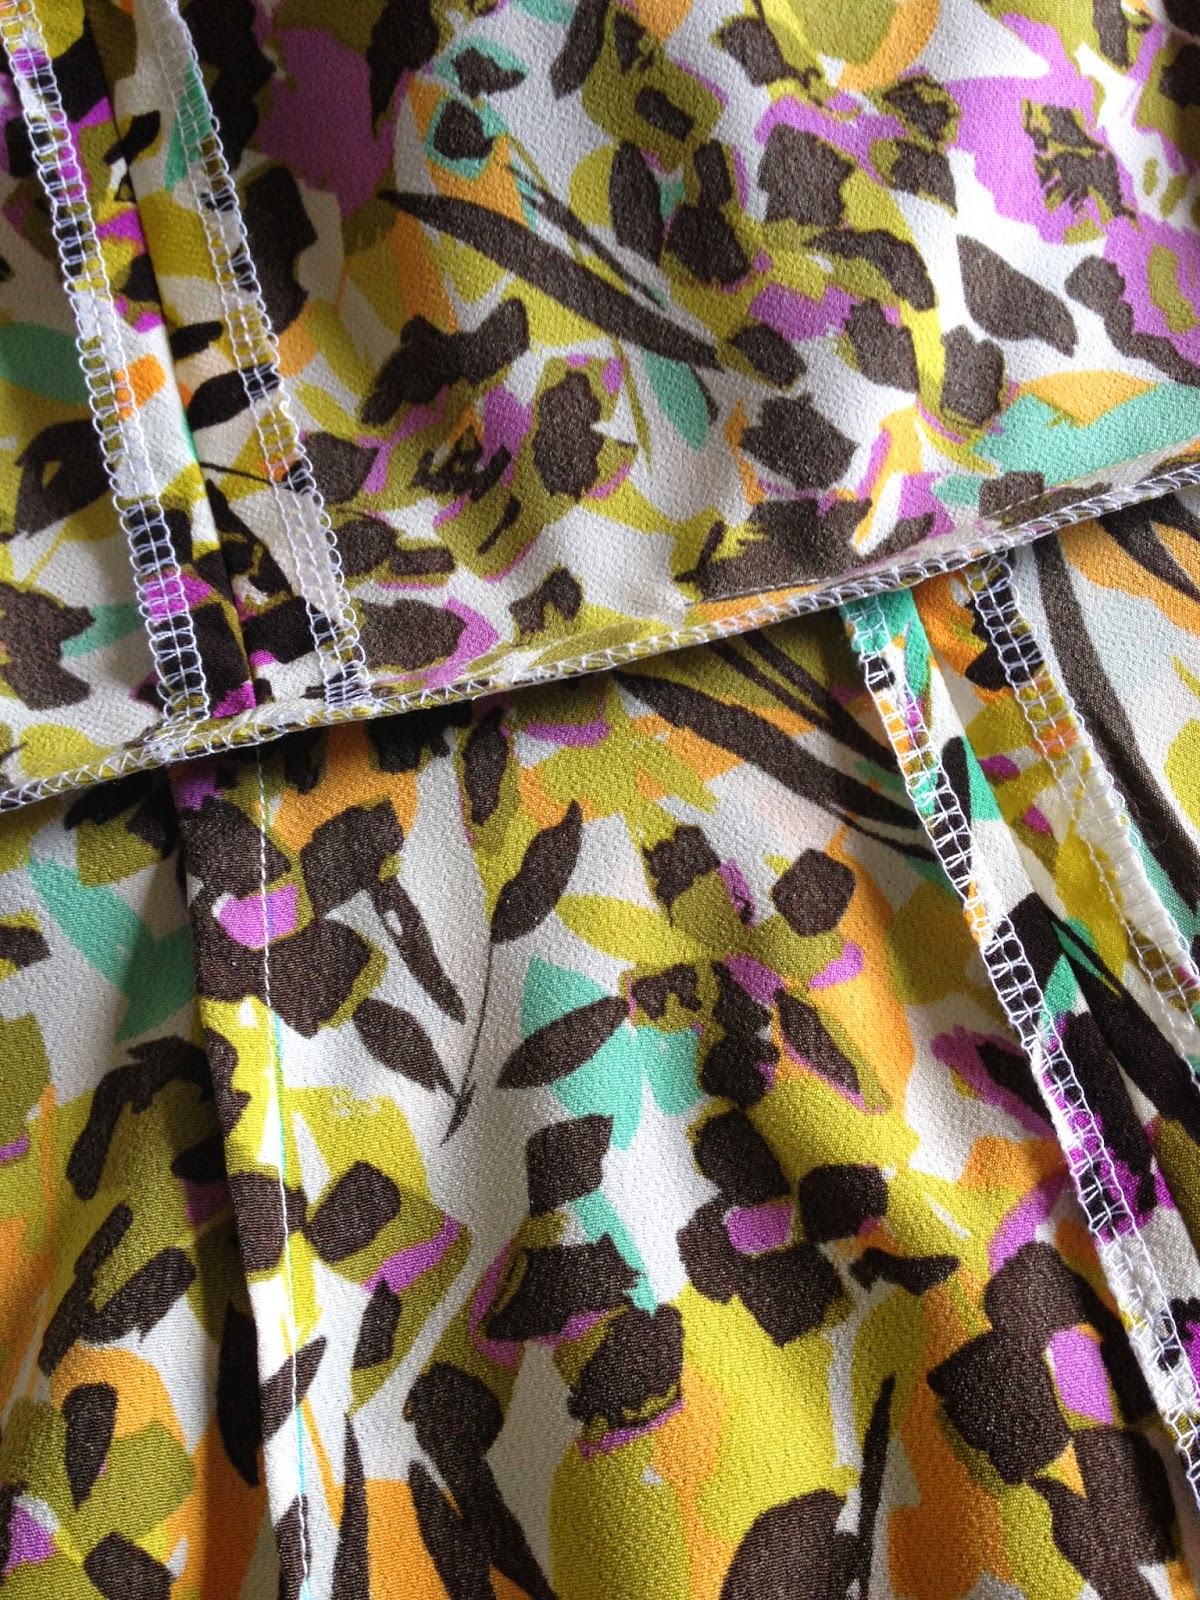
Construction wise this is a fairly straightforward shape to sew up. I really like how the short raglan sleeves look and how easy they are to sew up compared to setting in a sleeve! I also don't often sew dresses that don't have a waist seam so it came together quicker than most dresses I've made. I overlocked all my seam allowances, some of them I pressed open and then back together to finish them as one as the viscose is quite fine and my overlocker was producing much better results with a double thickness.

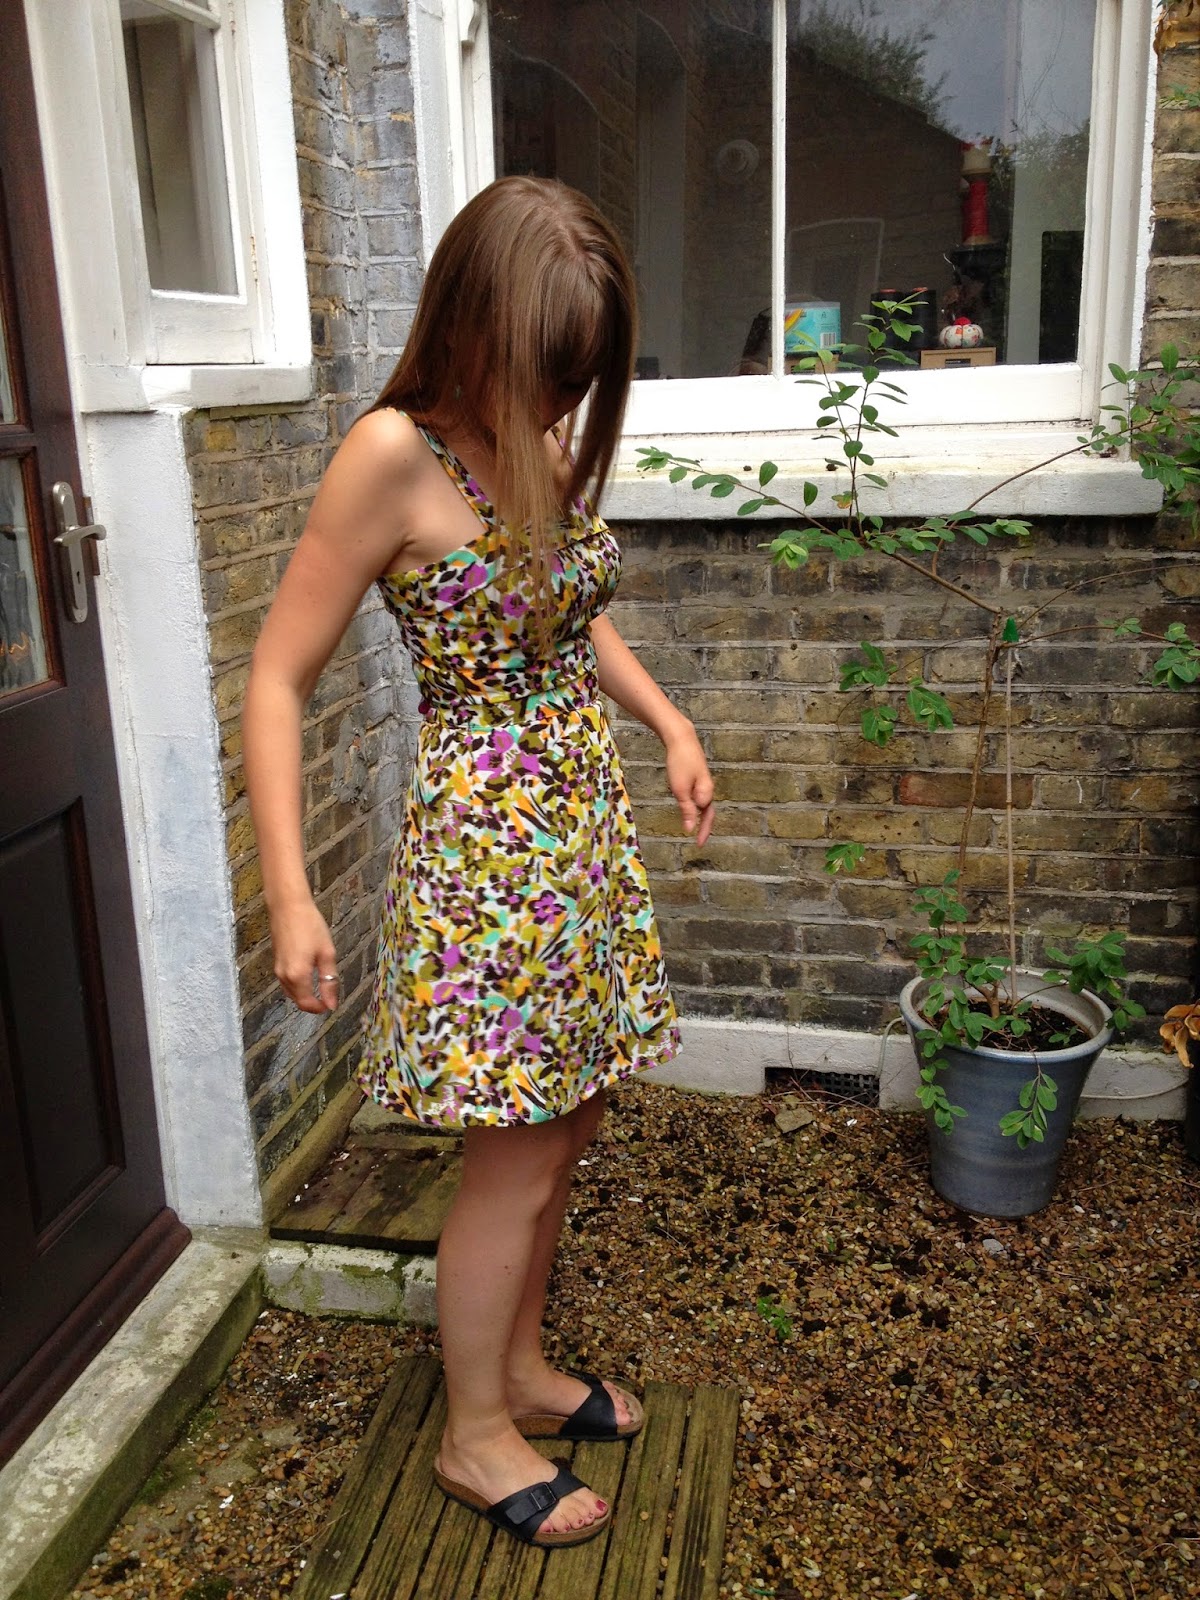
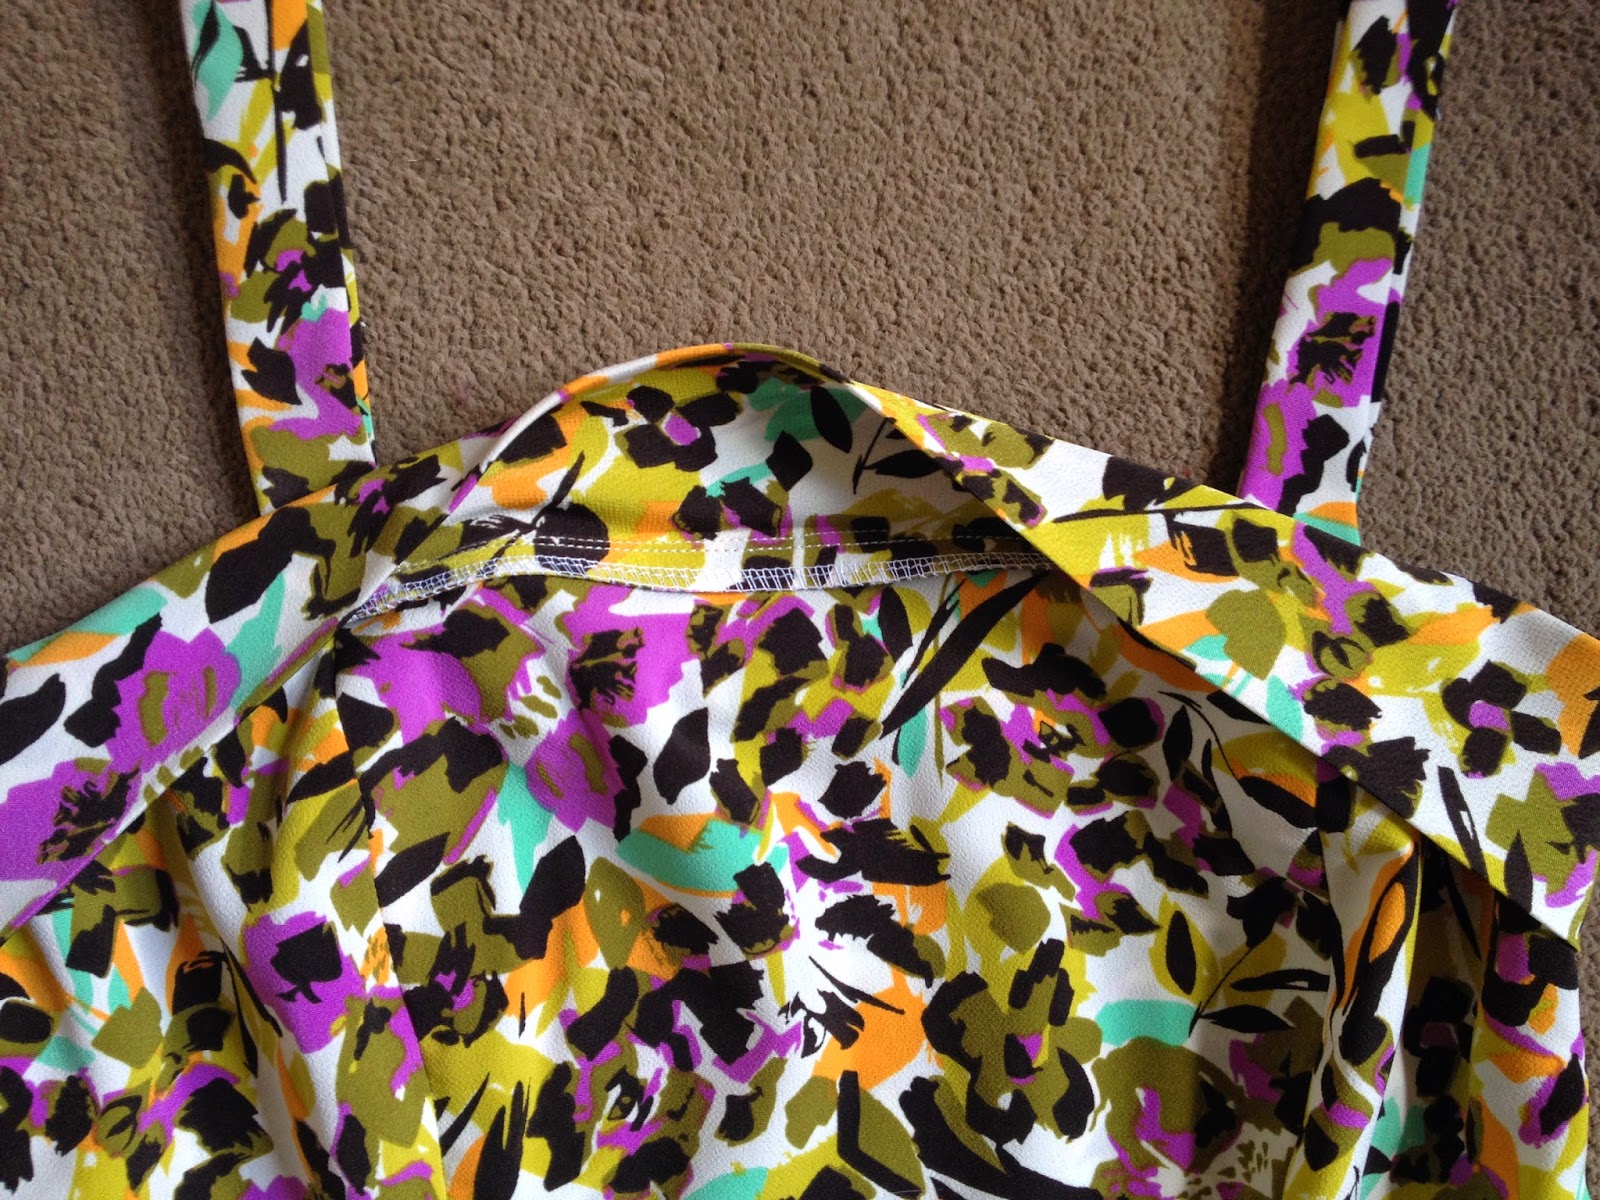
I was slightly dreading adding the binding to the neckline as this technique has very rarely turned out as neat as I would have liked in the past and in this shifty viscose I had a feeling things were going to get fiddly. It did take a bit of patience but I'm really pleased with the result, it's a nice and even width all the way around. I was helped by the fact that the viscose really responded well to the iron. Next time I will make sure to stay stitch these areas after cutting as my neckline isn't sitting quite flat at the top of my shoulders and I think this is to do with a bit of stretching at the top of the raglan sleeve pieces rather than the application of the binding.

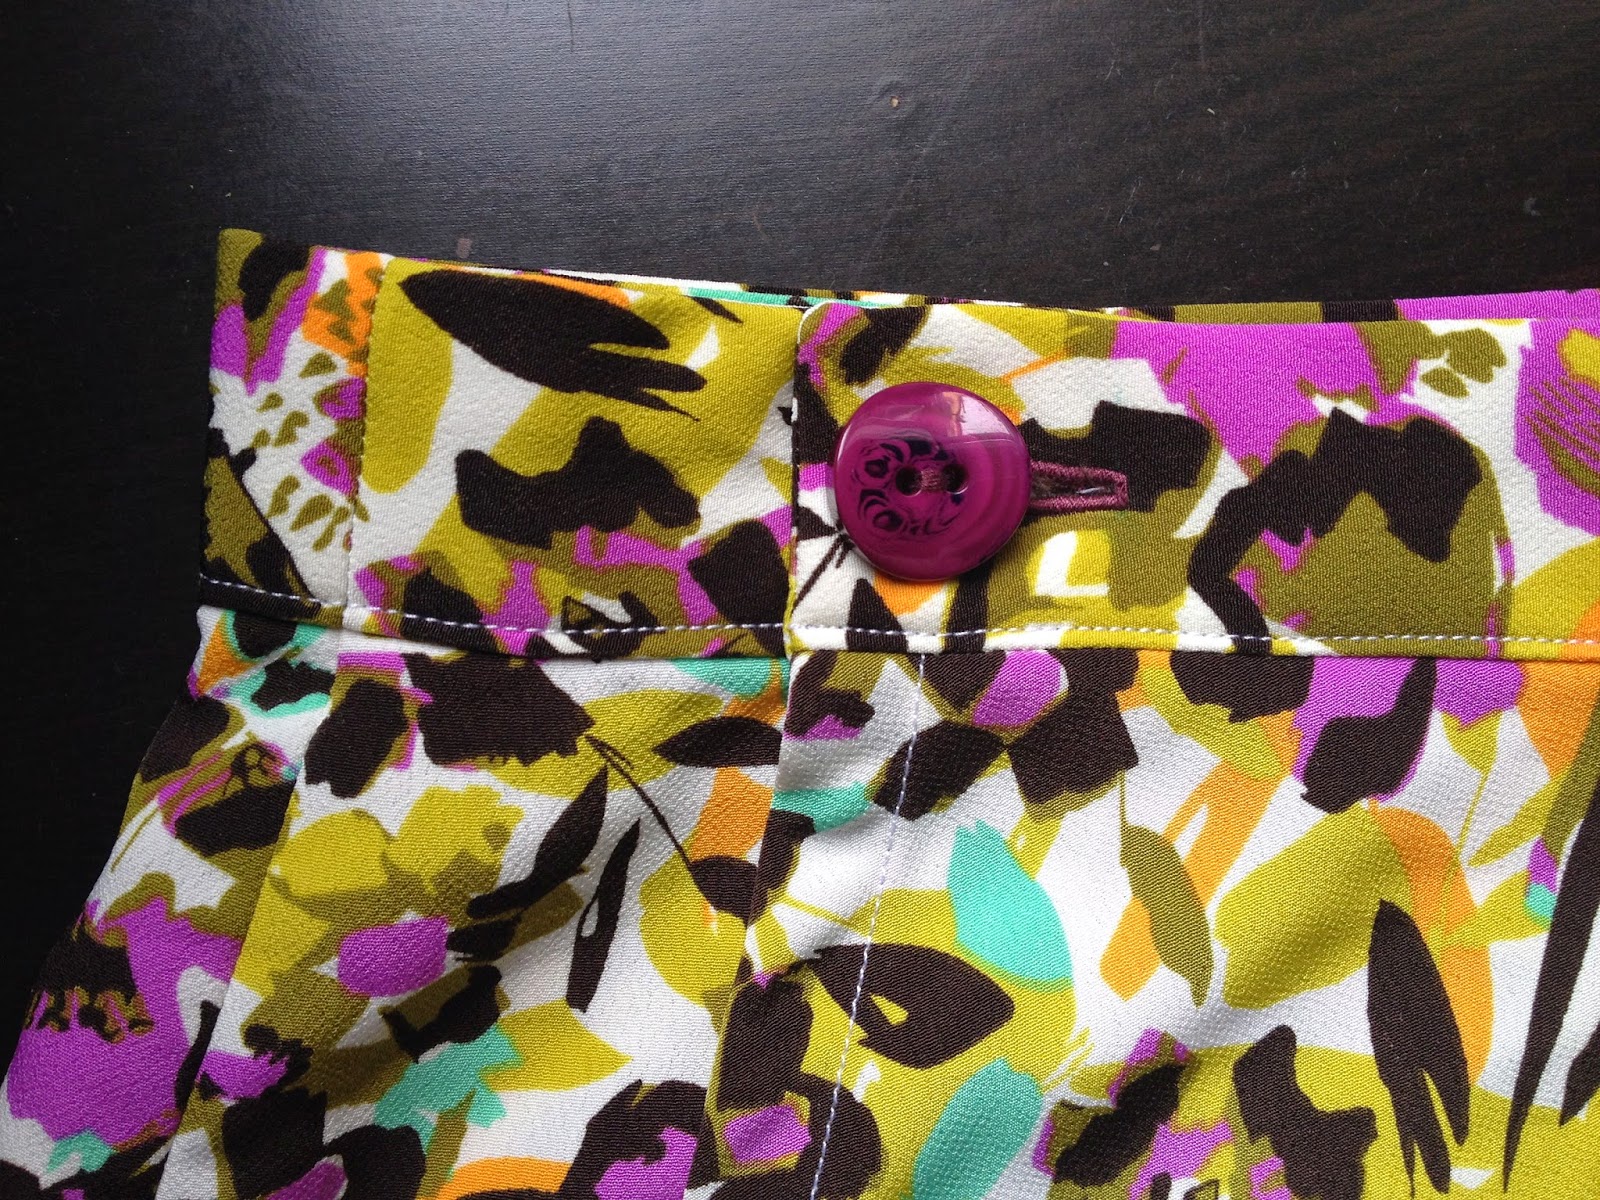
My favourite thing about the design of this dress is the V shaped feature above the bust which is actual diagonal inserts in the front pattern pieces. However, I totally messed up piecing these bits together accurately despite being really careful when pinning and sewing that centre front seam. They match up perfectly at the top of the V but are a good few millimetres out at the bottom. This means the left diagonal strip has ended up wider than the right diagonal strip at the centre front. I was super duper careful about sewing these pieces together with accurate seam allowances so I'm inclined to think it might have something to do with the fabric stretching out as those long diagonal edges are all on the bias. I spent ages deliberating what fabric to use for it and ended up using some left over scraps of rayon/viscose crepe from my La Sylphide Dress, which texturally and weight wise were a perfect match for the look of the main fabric. You do have to be a bit careful with handling rayon and I think this might have added to mysterious size difference issue. At one point I was thinking of using black silk organza for the inserts which would have been much less likely to stretch out. I definitely want to make another one of these so has anyone got any tips to help combat this and help me achieve a nice neat intersection? I've thought about maybe stay stitching or interfacing the insert pattern pieces?

With the exception of that little mishap I'm delighted with my new dress and am pleased I took some time out from this busy month to sew something just for me! If you fancy taking part this week and sewing yourself up something entirely selfish then make sure to link up your projects on Kollabora and don't forget to enter the amazing giveaway here. There are going to be 40 winners of different indie sewing patterns and one lucky winner of a $25 gift voucher for IndieSew.