Saturday 30 November 2013

A Spoolette Bowling Shirt (And a completed Sewlution!)


So my latest sewing challenge was to make a bowling shirt for a night of bowling, milkshakes, burgers and karaoke with the Spoolettes! (If you don't know about the Spoolettes then head over to Sew Dixie Lou right now and get involved!) The girls had all excelled themselves with their bowling shirts and embroidery skills so hopefully you'll start seeing quite a few of them popping up in your feeds. An amazing time was had by all and the lovely Alison from Another Little Crafty Creation made us all these amazing little badges! Thanks so much Alison.


I decided to go down a fairly simple and feminine route with mine, concentrating on the 1950's/60's look. It turned out as more of a 'bowling blouse' and I look like I belong in a diner but I love it and think I could even get some everyday wear out of it too!


I used vintage Vogue pattern 9318 which I was lucky enough to pick up in the swap at Rachel from House of Pinheiro's epic meet up at the V&A/Goldhawk Road in April. I'm not sure who donated it to the pile but whoever it was thank you very much, it's a great pattern and I had a lot of fun sewing it up. Once I had an idea of how I wanted it to look so I had a rummage through my stash for some appropriate fabric and came across this lovely soft cotton gingham which I also by pure coincidence picked up at the same swap! Thank you very much also to this kind donator. Although the pattern envelope is a little torn all the pattern pieces were present and fully intact so I set to cutting out all the pieces.


With this done and all the appropriate pattern pieces interfaced (I used the lightweight budget interfacing from Minerva Crafts, which I think is pretty brilliant) I was ready to sew. At which point i realised the construction instructions for this pattern either never existed or were missing! It was the first time I'd worked with a vintage pattern, I'm usually spoiled by the fantastic instructions that come with patterns from indie designers plus I've only ever made one other blouse before (my La Sylphide for the Mad Men Challenge) which didn't even have a collar so this little realisation stopped me in my tracks!


The cut out pattern pieces sat around for a few days before I decided that I really needed to get on with a bowling shirt or I was going to have nothing to wear. So I just went for it minus instructions and it turned out pretty well! I've actually proved to myself that I know more about construction than I think I do. How to put all these pieces together came sort of instinctively, there were a few aspects I puzzled over like it was a jigsaw but I didn't stand there clueless staring at the pattern pieces like I probably would have done a year ago.


The blouse is fully faced (along the centre front, hem and neckline) with quite wide facing which is a technique I have not tried before but really like. I decided the easiest way to construct this was to join all the facing pieces first and then attach them to the main fabric as one piece, like you might do with a lining. This worked out great, one continuous line of stitching at attach all pieces, pink and clip the seam allowances, turn right side out and press. I pinked all my seams for speed as I figured I wouldn't be wearing and washing this all that much.


The collar was really straightforward to sew up and attach. I'm glad the pattern didn't have a more complex collar with a stand or anything as I don't think I would have managed that without instructions! I was most pleased with how easily the sleeves were set in, I sewed in some gathering stitches in preparation but they hardly needed any ease at all and fit smoothly and neatly. The cuffs were also straightforward, before sewing up the sleeve seam I folded the interfaced band in half, stitched it to the right side of the sleeve, turned in, pressed and topstitched to highlight this detail.


I love the design features of this pattern; the rounded collar, shoulder darts and the nipped in waist. My favourite part is definitely the shaping at the hem.


As for the embroidery I chain stitched a small 'Fiona' on the chest. I love how this turned out! I did really want to do a big 'Spoolettes' motif across the back but didn't have time. Embroidery on that scale would be very time consuming and I didn't want to ruin the whole top by just scrawling across the back in a fabric pen, as tempted as I was. I'm hoping we can repeat this bowling meet up so I can add that to my shirt!


I'm also very pleased to say that this little sewing adventure, minus pattern instructions, marks the completion of my 2013 Sewlution! I signed up to Karen's sewing resolutions challenge last December and my pledge was as follows:


Well I think it's time to admit that my addiction to sewing has truly taken hold this year and to date I've completed 20 garments, smashing my target of 12 and there's still a month to go! This bowling shirt also completes the second part of my resolution being made from a vintage pattern. I've got to say I really enjoyed working with this pattern, I love the little vintage details, so hopefully next year I'll be able to make use of my collection of patterns from the 1950s and 1960s which my wonderful Nan gave me when I first started sewing.


I think all that can finish this post off now is a few pictures of the Spoolettes enjoying themselves on Saturday!


Tuesday 26 November 2013

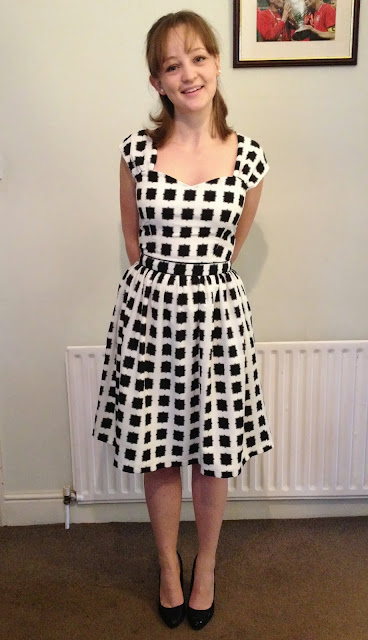
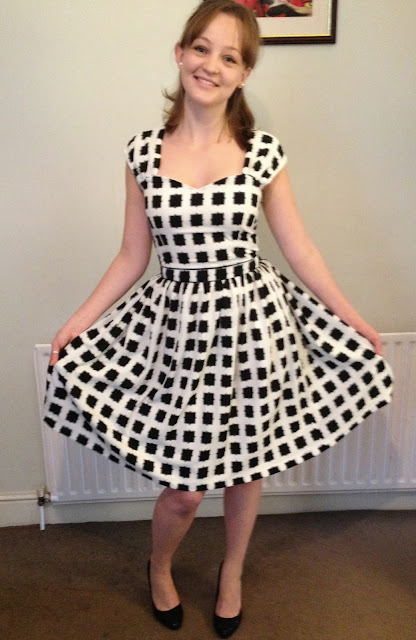
Geometric Cambie Dress

I'm finally catching up with blogging all the projects I finished a couple of months ago! I made this specifically to wear to a friend's wedding back at the end of September after my lovely boyfriend bought me the pattern for my birthday. We all know by now that I am a big fan of Sewaholic Patterns and I'd heard a lot of good things about the Cambie Dress so I couldn't wait to try it out!

Diary of a Chainstitcher Max Mara Style Geometric Print Sewaholic Cambie Dress Sewing Pattern

I wasn't at all disappointed. It is again another beautifully drafted pattern by Tasia and I think the only thing I would change next time would be to shorten the sleeve pieces by inserting the gathered ends deeper into the gap between fashion fabric and lining during the final steps. It doesn't slip off the shoulders but feels a little loose at this point; I think I must just be short in the body here.

Diary of a Chainstitcher Max Mara Style Geometric Print Sewaholic Cambie Dress Sewing Pattern

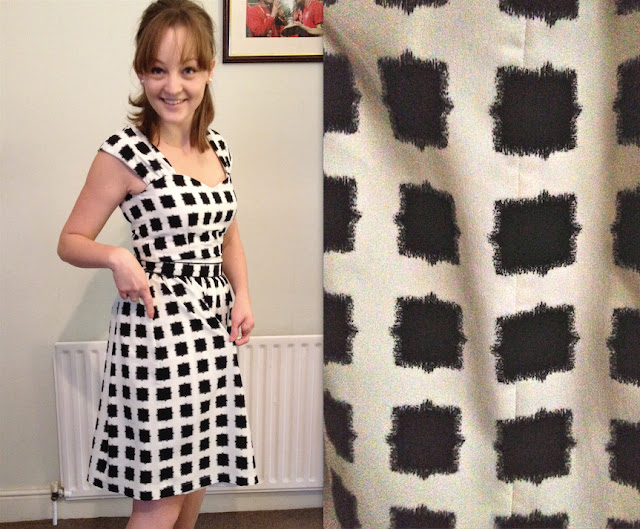
You may recognise the pattern of my fabric...it is in fact the negative print of the fabric I used for my Salme Playsuit in the summer. I LOVED the feel of the viscose I used for the playsuit so when I spotted this fabric amongst the jumble on my favourite market stall outside Rolls n' Rems in Lewisham I snapped it up! On closer inspection it was the same print but unfortunately not as silky to the touch. It's got a subtle crepe like texture and I have a feeling it's a poly blend but with it's weight and drape it worked fantastically for this dress and at about £5 for 3 metres I'm not going to complain! The lining is exactly the same fabric, bought from the same stall, just in a plain cream.

Diary of a Chainstitcher Max Mara Style Geometric Print Sewaholic Cambie Dress Sewing Pattern

I've only fully lined one other dress (my Circle-Skirted Elisalex dress) which I attached to the bodice of the dress following the By Hand London instructions for lining the bodice. I was really pleased with how this turned out at the time but now I've tried the Cambie way I think I'll be doing it on everything! In fact I've seen quite a few other bloggers talk about using 'the Cambie lining technique' in a lot of their makes. Tasia's method involves attaching the lining after the invisible zip has been inserted into the main fabric and includes securing the lining to your zip using your regular machine foot rather than hand stitching afterwards. This way you get a lovely crisp, clean finish at the corners where your zip meets the neckline. I love it!

Diary of a Chainstitcher Max Mara Style Geometric Print Sewaholic Cambie Dress Sewing Pattern
The lovely clean finish along the zip makes me so happy!

If you follow the instructions the entire finish of your dress will end up clean and crisp. I pinked all my seams for longevity but there would be no need to otherwise as all seams end up concealed. I also love the feature of using the fashion fabric as both sides of the waistband. Don't you think just that little hint of the outside inside livens up the lining beautifully?! I know no one will ever see it but I know it's there!

Diary of a Chainstitcher Max Mara Style Geometric Print Sewaholic Cambie Dress Sewing Pattern

I chose to make view B of the pattern with the full skirt. I imagine view A is perfect for everyday wear but I wanted something a little bit special for the wedding which I could have some fun dancing in. Plus who doesn't enjoy the 1950's feel of a full skirt?! This skirt, fully lined and in this fabric is dreamily swishy and rustles nicely when I walk which makes it feel special.

Diary of a Chainstitcher Max Mara Style Geometric Print Sewaholic Cambie Dress Sewing Pattern

I was concerned about the amount of gathering around the waist. I'd never made a skirt like this and can't remember having any similar in my wardrobe so was wary about adding bulk in this area. In a thicker fabric it might be a problem but I think the fact that there is a waistband of a good width around the narrowest part of your waist means you don't loose definition here, like you might if the gathered skirt was attached directly to the bodice.

Diary of a Chainstitcher Max Mara Style Geometric Print Sewaholic Cambie Dress Sewing Pattern

I used some black satin bias binding as piping along either side of the waistband to highlight that feature in amongst the print. I was going to add this along the top of the neckline and to edge the sleeves in the style of Winnie from Scruffy Badger Time's beautiful polka dot version. However, I was worried about achieving a smooth even finish around the sweetheart shape of the neckline and to be honest was running out of time to finish the dress so left it off. I'm pleased I did as I don't think in this dress it needs it. I might add piping here on a future version if I try out Tasia's tutorial for making the neckline straight.

I made an attempt at pattern matching (seeing as the shape of the skirt is so simple) and am generally pretty pleased with how it turned out and how the squares are laid out on the bodice. Just check out the pattern matching down the right hand side seam!

Diary of a Chainstitcher Max Mara Style Geometric Print Sewaholic Cambie Dress Sewing Pattern

The left hand side seam is not quite so good however...

Diary of a Chainstitcher Max Mara Style Geometric Print Sewaholic Cambie Dress Sewing Pattern

You can't see it very well in that picture but down this side seam the tiles ALMOST match but their almost matching somehow seems to make it more obvious that they don't! It's all because I thought as the fabric was a little sheer and I could see the black squares through I could get away with cutting a double layer like usual instead of each pattern piece twice on a single layer as Lladybird recommends in her pattern matching tutorials. I thought if I made an effort to get the squares of both layers exactly matching as I looked through the fabric then both pieces would come out exactly the same but obviously things shift ever so slightly when cutting this way making the pattern matching ever so slightly off when sewn up.

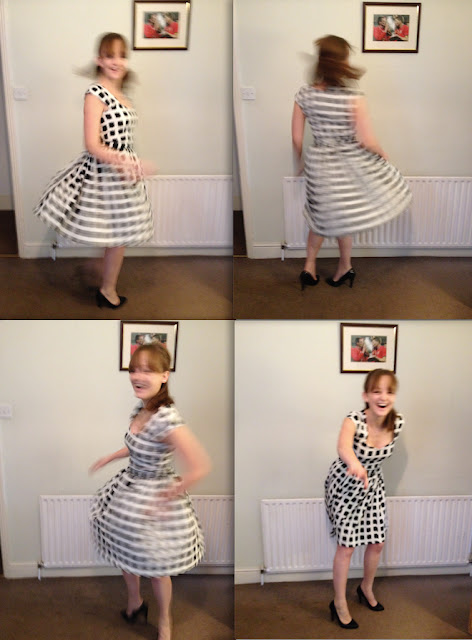
I'm really pleased with the finished product and found it really satisfying to sew. Tasia I feel like you've improved my sewing skills yet again! Plus, in the style of Taracat...it's the perfect dress for dancing!

Diary of a Chainstitcher Max Mara Style Geometric Print Sewaholic Cambie Dress Sewing Pattern

Tuesday 19 November 2013

My Completed Robson Coat!

Diary of a Chainstitcher Forest Green Sewaholic Robson Coat Sewing Pattern

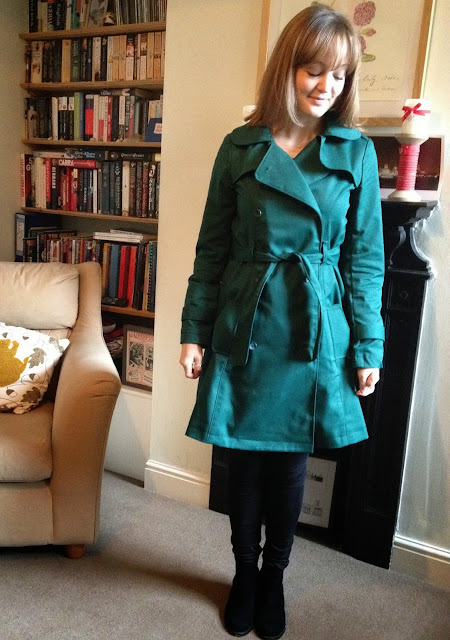
Tah Dah! I'm giving you warning this is going to be a long post with lots of photos but I'm not going to be cutting it down because I'm so SO proud of this make! It's the Sewaholic Robson Coat and definitely the best and most complicated garment I have sewn to date.

Diary of a Chainstitcher Forest Green Sewaholic Robson Coat Sewing Pattern

I can't believe I've actually made a coat! But first things first, a big part of this accomplishment is down to Tasia from Sewaholic's amazing drafting skills and instructions. I've always loved working with her patterns and in fact her Lonsdale Dress was the first dress I ever made so I knew if I could make any coat it was going to be this one with Tasia's guidance to hold my hand throughout. This pattern is a dream, not only do I love the design of it (including rounded collar and storm flaps), the construction process is genius and you end up with a beautifully finished coat inside and out without the need for lining. If you're tempted by the challenge of making a coat I think a lightweight style like this is a good place to start and I highly recommend this pattern in particular!

Diary of a Chainstitcher Forest Green Sewaholic Robson Coat Sewing Pattern

You do need a lot of supplies for making this coat so costs can add up but I still spent considerably less than I would have done buying one in the shops that will last as long as this, and even if it did add up to more it would be totally worth it! I used a rich green cotton twill from A-One fabrics on Goldhawk Road for a bargain £4.95/m. I bought 4 metres but I think if you are careful and are removing some of the length as I did you could get it out of 3.5. The fabric was an absolute dream to work with, pressed beautifully, went through the machine smoothly even at bulky points and as I've worn this every day since I finished it I can vouch for it holding up in the unpredictable UK weather.

Diary of a Chainstitcher Forest Green Sewaholic Robson Coat Sewing Pattern

The buttons were from the haberdashery stall at my local market and I used medium weight black iron on interfacing from Minerva Crafts. I chose to use their budget version as it was my first attempt at a coat and you need quite a lot for this. I was a bit concerned about the interfaced pieces being a bit like cardboard to begin with but once pressed and handled as the rest of the coat came together they've softened up nicely.

Diary of a Chainstitcher Forest Green Sewaholic Robson Coat Sewing Pattern

I was torn between cutting a size 4 or 6 (Sewaholic size) but in the end opted for a 4 as looking at the finished garment measurements they included a lot of ease, particularly around the waist where I like things to be fitted. I made the right choice as I feel like this fits comfortably and I can move easily, even with it done up over a jumper, and I don't feel like I'm being swamped by a coat which I hate. In case it's useful to know I'm 5ft 3" and I took 2.5" off the length and didn't shorten the sleeves at all. The length out of the envelope hit just below my knee which you might like but I prefer this style of coat to be shorter as I know I will wear it a lot with jeans.

Diary of a Chainstitcher Forest Green Sewaholic Robson Coat Sewing Pattern

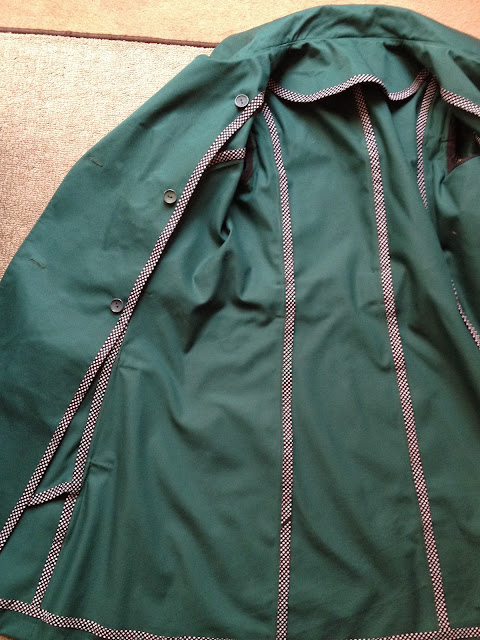
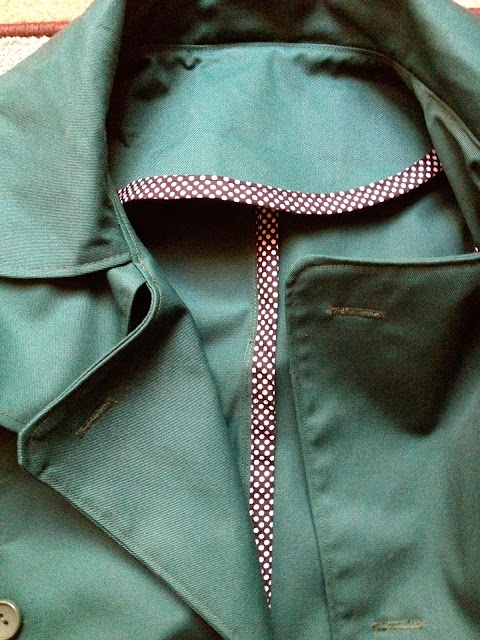
The inside is all finished with bias binding. I love this element of the pattern as it's another aspect that you get to be a bit creative with. I used this polkadot cotton binding, again from Minerva Crafts. It's wider than the pattern calls for (25mm instead of 13mm) but it worked out fine and I'm pleased that it's a bit more visible than the narrow tape would have been. It was great to work with as it held a crease nicely once I'd pressed it to fold it in half. I could then sandwich the raw edge inside it and stitch it on just once rather than sew on one side, fold it over, then sew it down again. A great time saver. One thing to mention about this though is that the pattern calls for 11 metres and as a couple of other bloggers have mentioned, I used way more than that! I had to order more (which I didn't mind as it meant I ordered a tailors pressing ham as well which is a revelation!) and still didn't have quite enough so I ended up binding the arm holes in plain black binding which worked out fine.

Diary of a Chainstitcher Forest Green Sewaholic Robson Coat Sewing Pattern
I love the buttons inside which keep everything sitting nicely when worn

I was initially thinking about making this up in black as I thought I would get more wear out of it but I'm so pleased I went for one of my favourite colours instead as it looks great with most of my wardrobe! I've never had a coloured coat before and it makes such a difference to your mood on a cold and wet morning on a train platform full of commuters in black. The strange thing is about this fabric is that (as well as looking wrinkly when it's not!) it seems to come out a different colour in nearly every photo! It's actually a gorgeous forest green, I think this photo is the closest colour wise:

Diary of a Chainstitcher Forest Green Sewaholic Robson Coat Sewing Pattern

I learnt SO much making this coat. Looking back now I'm not sure why on earth I thought this project was suitable for me to try as there were so many techniques involved that I had never attempted before, I'd never even sewn a buttonhole! Ha! (F.Y.I. So much easier than I thought!) But I'm so glad I went for it because I've made something I'm really proud of and it's spurred me on to set myself some more sewing challenges. I've also crossed off quite a few techniques on my Technique Checklist which was exciting!

Diary of a Chainstitcher Forest Green Sewaholic Robson Coat Sewing Pattern

As I went along I was so pleased with what I had already done that I was terrified of messing up the next part and ruining all my hard work! I think the coat sat ready for belt loops and button holes for about 3 weeks, partly because I didn't have much time to sew but also because I was terrified of doing those parts! The seam ripper did come out quite a lot (particularly around the collar area) but I learnt to be patient and took time to look up techniques and reread instructions to make sure I was getting things just right.
Diary of a Chainstitcher Forest Green Sewaholic Robson Coat Sewing Pattern
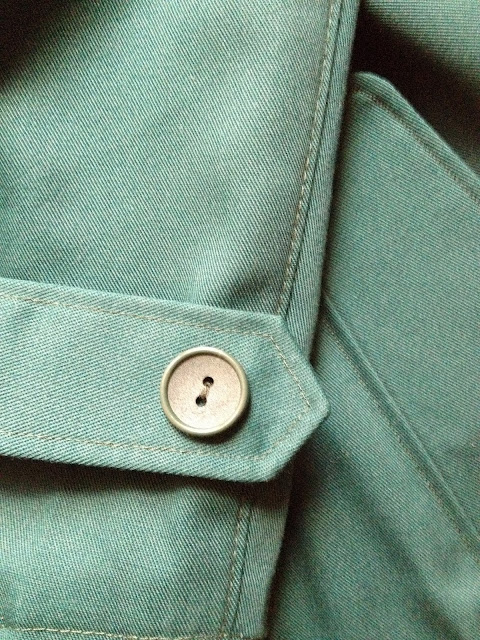
I'm most pleased with my topstitching; is it weird that I really enjoy that part?!

I thoroughly enjoyed every single step of this make, even the cutting out! I knew it was going to take some time (there are pattern pieces!) so it was great to be able to just accept that and go nice and slowly with all these new techniques to make sure everything turned out just right. I think I can sometimes have a tendency to set myself unrealistic silly deadlines with my sewing and trying to speed through things can often result in there being a few things I'm not 100% happy with about the garment. I knew this would be a piece I could get a lot of wear out of if done right so I wanted to put the time and effort in to every element.
Diary of a Chainstitcher Forest Green Sewaholic Robson Coat Sewing Pattern
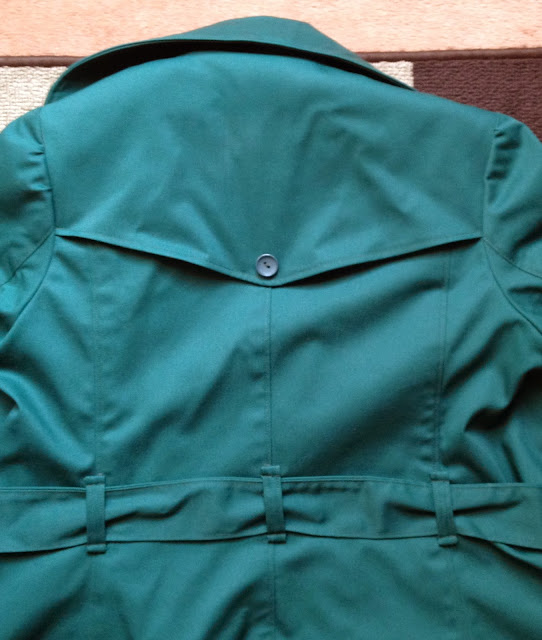
See what I mean about the colour looking different?!

Even though it's a huge time consuming project when I finished this one I wanted to start another! I'm holding off for the time being but you may see another appear in the Spring. Next time I'd like to try using a patterned fabric for the pocket linings and undersides of the storm flaps and now I know I love the style I'd splash out on some fancy interfacing. The only other change I would make is to shorten the coat and sleeves at the 'lengthen/shorten here' lines on the pattern rather than cutting it off the hem. I only did that this time as I couldn't decide at the cutting stage what length would look right and if I would need to shorten the sleeves at all. I'm happy with how it looks this time but the pockets are perhaps just slightly too low to be the perfect resting position for hands and the sleeves could maybe do with being just an inch shorter.
Diary of a Chainstitcher Forest Green Sewaholic Robson Coat Sewing Pattern

I think big projects like this which I can really sink my teeth into and which include some new techniques to challenge myself with are my favourite things to sew. Any suggestions for what I should try next?!